
A dry coating forms a mineral or synthetic layer bonded to the wall. Its removal is not simply a matter of scraping: the composition of the product (plaster, cement, lime, acrylic resin) determines its hardness, porosity, and reaction to water or heat. Therefore, removing dry coating from a wall requires adapting the method to the material, or risk damaging the substrate or generating harmful dust.
Health risks associated with removing dry coating indoors
Sanding or scraping a dry coating releases fine particles that remain suspended in the air for several hours. Cement or lime-based coatings have a high alkaline pH: the dust irritates the respiratory tract, eyes, and skin upon prolonged contact.
See also : Secure Your Streaming Experience: Effective Strategies for Safe Viewing
Since 2021, the recommendations from INRS (brochure ED 6408) emphasize the prevention of risks associated with indoor construction dust. Feedback from facade workers and drywall installers confirms that the combination of a giraffe sander and a class M vacuum cleaner has become the standard practice for containing these fine dust particles during the removal of dry coatings.
Before starting, it is important to know how to remove dry coating considering the exact nature of the applied product, as the risks vary significantly from one type of coating to another.
See also : Essential Tips for Taking Care of Your Health Daily
- Wear at least an FFP2 mask, protective goggles, and alkaline-resistant gloves throughout the duration of the work.
- Cover the floor and openings with polyethylene film, then ventilate the room through mechanical extraction (and not just by opening a window, which disperses dust into adjacent rooms).
- Vacuum the residues with a class M vacuum cleaner or higher, never with a household vacuum cleaner whose filter allows fine particles to pass through.

Identify the nature of the coating before choosing a removal method
A plaster coating can be easily scratched with a fingernail and responds well to moisture. A cement coating resists scraping and requires mechanical tools. An acrylic coating (like “old wall”) forms a flexible, sometimes elastic film that behaves neither like plaster nor like cement.
The implementation guides from Weber (2023) and Parexgroup (2022) recommend testing the nature of the substrate and the coating before any removal. A simple test involves moistening a small area with a sponge and observing the reaction: a plaster coating softens within minutes, a cement coating remains unchanged, and an acrylic coating beads or slightly swells.
The case of lime-based coatings on old walls
Some recent lime-based coatings are designed to remain microporous. This microporosity allows the wall to naturally regulate humidity, protecting old masonry (stone, brick, wattle) against rising damp.
Steam or overly alkaline solutions weaken these lime coatings and can compromise the wall’s ability to breathe after removal. On an old wall, gentle mechanical scraping (wide spatula, blade scraper) is preferable to any chemical or thermal method.
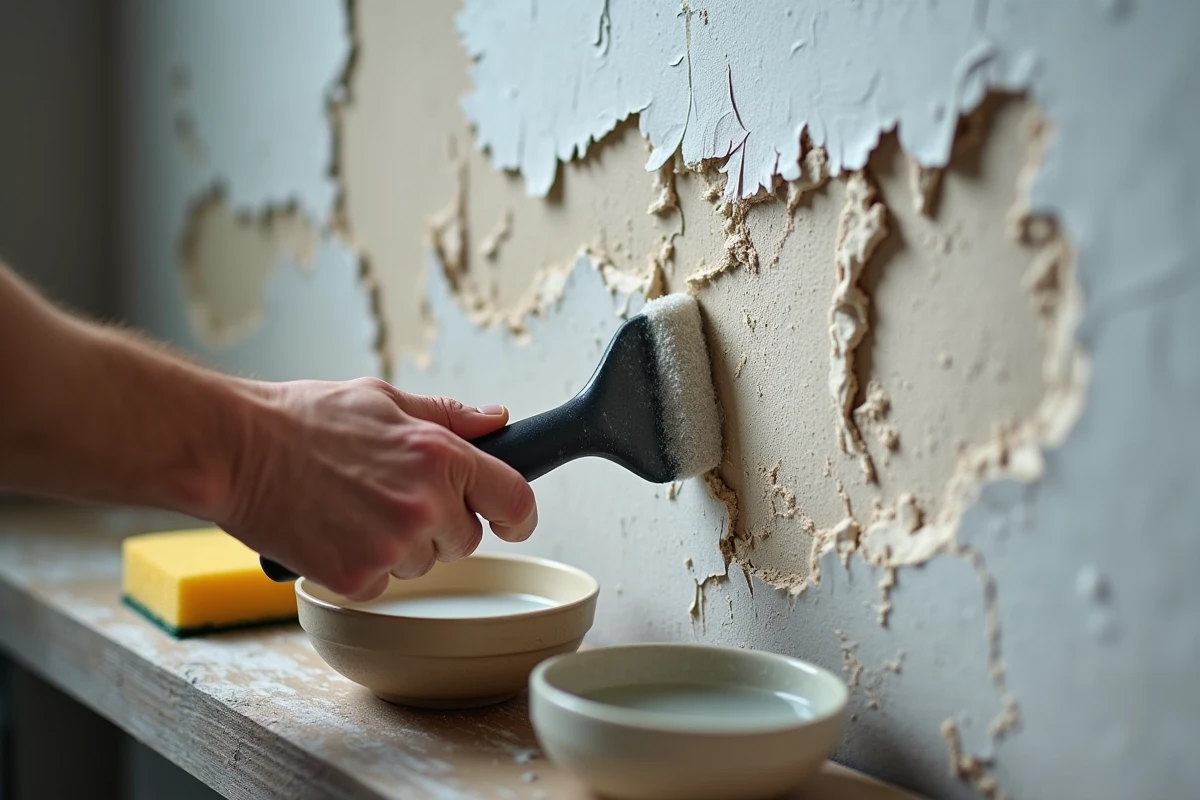
Removing dry plaster coating: water and spatula above all
Plaster coating offers the most accessible removal. Spraying warm water on the surface and letting it penetrate for about fifteen minutes softens the layer enough for a rigid spatula to peel it off in sheets. Working in areas of about one square meter prevents the water from drying before scraping.
For thick layers, a steam stripper for wall use speeds up the process. The steam penetrates deeper than sprayed water and detaches the coating from the substrate without excessive effort. The technique remains the same: spatula angled at about 30 degrees, steady pressure, without digging into the substrate.
After removal, the wall must dry completely before any new finishing. Applying a coating or paint on a still damp substrate traps moisture and causes peeling in the short term.
Cement coating or hard plaster: mechanical tools and precautions on the substrate
Cement adheres to the substrate through chemical bonding. No amount of water will soften it. Removal involves mechanical tools: giraffe sander for large flat surfaces, electric chisel (with wide flat chisel) for thicknesses greater than a few millimeters, hand scraper for finishing.
Giraffe sander and integrated suction
The giraffe sander equipped with a diamond disc grinds the cement coating layer by layer. Connecting a class M vacuum directly to the sander captures the majority of dust at the source. Without this suction, the amount of fine particles makes the room unbreathable within minutes.
The main risk with the chisel is damaging the masonry beneath the coating. On an old stone or brick wall, setting the power to minimum and working tangentially to the surface limits damage. On drywall (plasterboard), the chisel should be excluded: it would penetrate the board.
Acrylic coating like droplet or interior plaster
Interior plasters based on acrylic (especially droplet finish) resist water but soften under heat. A heat gun set to moderate temperature, combined with a spatula, allows these coatings to be removed in strips. A chemical stripper suitable for resins may also work, but the wall must be rinsed thoroughly before applying a primer.
Preserving the insulation and humidity regulation of the wall after removal
Removing a coating exposes the raw substrate. On an old stone or brick wall, this layer of coating often contributed to the hygrometric regulation of the room. Leaving an old wall without an appropriate finishing coating degrades its thermal and moisture performance within a few months.
After removal, check the condition of the substrate: cracks, friable areas, signs of active moisture. Fill in the defects with a compatible coating (lime on old walls, plaster on drywall) before applying the new finish. On a stone wall, prefer a lime coating rather than a cement coating, which would block moisture exchanges and cause internal degradation of the masonry.
The choice of removal method directly affects the quality of the bare wall obtained. Aggressive sanding creates hollows that require additional leveling. Poorly rinsed chemical removal leaves residues that prevent the adhesion of the new coating. Taking the time to identify the product, adapt the tool, and protect your health during the work: these three steps determine the success of the job much more than the speed of execution.